Showing posts with label recipes. Show all posts

January 10, 2013

tofu, otherwise known as whale snot


A couple of months ago I mentioned that our family is meandering toward vegetarianism. Or not really vegetarianism, since we do eat meat, albeit rarely. Maybe it would be better to say "a more plant based diet".  Except with bacon. And by our family I mean Will and I because Evie doesn't eat meat really (except bacon) but she doesn't really eat plants either. And Briton IS NOT A VEGETARIAN, MOM. So, yeah. It's really just Will and I. Whatever.

It's going well, believe it or not. I don't really find myself missing meat. And when we do, we cook meat. And Briton has his ham and cheese sandwiches to fill his meat lover moments.  But we are eating less and less and are pretty happy with it. It's expanding all our horizons, and that's a good thing. The other day I made quiche with rainbow chard and Evie asked what "that stuff" was and I told her rainbow food. She only picked out the really obviously green pieces, so I count that as a win.

I also mentioned that I have been a vegetarian once before, and that I was, I freely admit, a terrible vegetarian. I didn't really know how to cook much at all and cooking vegetarian food mostly meant replacing all meat in recipes with TVP and eating a lot of pasta. Which wasn't hugely successful, but I tried. I was young and dumb and poor and the three cookbooks I owned weren't much help. Especially the one all about meals colonial Americans would have eaten which, as a history major, I found fascinating, but I've never cooked a single thing from it. This time around I've been experimenting with all sorts of things. Faro and barley and crazy cheeses and meals that wouldn't need meat anyway instead of meals where the meat is just missing. But I've been resolutely avoiding one thing, one very "vegetarian food" thing. Tofu.

The thing is, tofu and I have a long, sordid history. When I was a kid, probably around Evie's age, we learned about tofu at a health food demonstration at school, came home and asked my dad what it was.

He told me that the word tofu was Japanese for "whale snot."

So, yeah. Being one of those kids who believed pretty much everything her parents said. I didn't try the tofu the next time it came around.

In fifth grade we had another tofu demonstration (and now that I think about it, it's weird that in Northern Idaho we were discussing tofu in the 1980's, because I honestly don't remember having tortillas back then, and tortillas seem way more accessible that tofu) this time we made tofu lasagna and I came away with the impression that tofu (which I still semi-believed was actually whale snot) was good in lasagna because it just tasted like lasagna. And who doesn't like lasagna?

So most of my life, that's been tofu. Just whale snot that you add to things when you wont notice there is tofu in them. If you have to. Otherwise. Yuck.

Fast forward to this week. Will, wonderful guy that he is, bought me one of Heidi Swanson's cookbooks for Christmas because I mentioned at some point that I liked the recipes on her blog, and, after thumbing through, I decided to try a soba noodle dish with, gasp, tofu.

Naturally I didn't tell my family. Even after it was made and waiting in the fridge, I just told them dinner was in the fridge and left for a PTO meeting. I only told Will later that "that stuff in the noodles" was tofu. Because surprisingly, it was really good. Really good. Snack on it the next day good.

Amazingly, I've figured out how to make tofu not taste like whale snot.

This was not, clearly, my own discovery. I read through the recipe, which called for dry frying the tofu and then went in search of more info on dry frying and came across some ideas for dry frying and then marinataing thinly sliced tofu and man, seriously? Where has that been all my life. Not a hint of whale snot! Will loved it, Briton liked it and Evie ate more than two bites. Holy cow. I feel like a whole new world of food has opened up.

So now that I'm not steering clear of the whale snot, I'm curious, does anyone out there cook it in an interesting way that I should try?
November 6, 2012

halloumi and veg


Once upon a time, and I know I've told you this story before - but this time it has a different ending, I promise!- I was a vegetarian.
 
A terrible vegetarian, yes, the kind who ate a lot of TVP in things because I didn't know how to cook without meant so I just switched all meat for the tasteless little grains, but still, a vegetarian. And Will was not. Poor Will, I knew it was true love when a Texas boy who loved his steak and BBQ and potatoes cooked in pig fat could live with terrible vegetarian me. I was a (terrible) vegetarian through most of college, on through grad school and the first year of our marriage, sometimes to lesser degrees (I still ate meat on occasion) until about halfway though my pregnancy with Briton when, Phoebe-like I came home one day crying for ribs. CRYING for them. I think that, and not our wedding day or the births of our children, may have been the happiest day of Will's life. Seriously.

In the years since (10!) I've toyed with the idea of being a vegetarian again. Not specifically because I have problems with meat-I don't find it gross. But I do find the way most meat is produced to be gross - so I'd rather eat no meat, or less meat but good meat. However much I've thought about it, though,  it just hasn't always been in the cards, mostly because I've been married for 12 years to a committed carnivore.

So (and here comes the new ending) you'll imagine my shock when a few months ago, Will came home from work and said that he wanted to try being a vegetarian. Or more precisely, a sort of vegetarian. Like a - we can eat meat while we're out, but not really cook it at home - vegetarian.

I did a little dance, you guys. Right there in the kitchen.

This time around I'm trying to be a better sort-of-vegetarian cook. Trying to explore interesting foods that aren't missing meat because they don't need it.My favorite cookbook is River Cottage Veg, both for recipes and for philosophy. It's written by a self proclaimed meat lover and I like that his attitude is similar to mine.  Very occasionally I buy meat to cook, but generally only really good, local stuff. Like chicken sausage for cassoulet or the occasional package of bacon for breakfast. But mostly, we're vegetarian now.

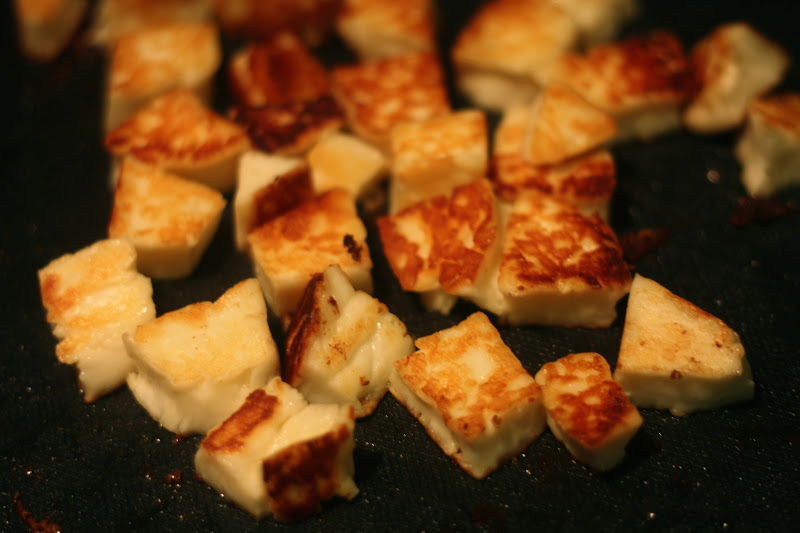
Which brings us to dinner. And Halloumi. If you've never had Halloumi, run to your nearest specialty food store and pay whatever ridiculous amount they want for it, then come home and fry it up. Seriously. It's like the Nutella of cheese. So good, so weird, so addictive. My only complaint is that it comes in too small a package, and buying two would be so wrong. Both price wise and calorie wise.

I used to fry up Halloumi slices with red peppers and sausages, but this time I roasted up a bunch of veggies over the course of the afternoon. That sounds time consuming but it was more of a convenience thing. Will hates the smell of cooking Brussels sprouts so I always cook them while he's out. (I know, it's weird. He also dislikes onions and doesn't care for....garlic. I almost can't even say that without fainting) And I cooked the mushrooms on my handy dandy electric griddle (have I told you guys how much I love that thing? And my mom for buying it for me? Well, I do. And it's awesome for cooking mushrooms and Halloumi) And then the rest went in the oven closer to dinner, with the first cooked veg to be tossed in at the end. That way everything didn't smell like Brussels sprouts and it was all cooked and ready at dinner.

Yum. Really. YUM. Not pretty maybe. But definitely yummy. And who needs meat? Not with this. Crusty bread, yes. Red wine, of course. Meat? Eh, no thanks.

By the way. Meat boy is now ordering vegan sandwiches when he goes out to lunch at work. Which is really funny if you know the story of Will and the Vegan Muffin.

*And by the way, in case you are wondering, the kids are pretty much on board with this. Evelyn, although I didn't realize it until recently, is basically a natural vegetarian. The only meats she has ever eaten not under duress are chicken drumsticks and bacon. But she could do without just as happily. Even as a baby she wouldn't eat food with meat in it. Go figure. Briton misses his meat, hence the bacon for breakfast at times. But he get's meat in school where, as I've mentioned, they have an absolutely bad ass lunch program. He told me last night he was ok with us being vegetarian at home, but he was still going to eat meat if that was ok with us. Which it is.
!

March 12, 2012

saturday scones (on a sunday)

Did I ever tell you guys about the time I baked scones for my wedding in my hotel room? Actually, to be totally honest, I cant remember if I baked them before hand and warmed them up in the hotel or if I baked them there. I think I did a little of both.
When Will and I got married, DIY weddings were not as cool as they were today. There was no Pinterest, no features on Design Sponge, not even a lot of books apart from the giant tome by Martha and a few magazines. We didn't really set out to have a DIY wedding. But we were poor students and considered ourselves (wrongly, I suspect) very style forward. So we enlisted a lot of help from family and friends, especially after the caterer doubled his prices and I fired him. So the bridesmaids mixed huge vats of punch on the floor of our hotel room, one uncle took photos, cousins were bridesmaids and flower girls, appetizers were made and brought from other Aunties and Uncle's kitchens. We assembled bouquets the morning of the wedding on my bed. My mother made my dress based on a few blurry photos and my descriptions, embroidering tiny flowers and beads around the neck. (And you thought I was the crafty one!) I picked up the tea sandwiches from a deli and made the scones.

I think it might have been the first time I ever made scones, to tell you the truth. I'd like to say I at least did a test run, I know I should have, but it might have gone by the wayside in those last few weeks. Lucky for me it was a good recipe.

And one I've hung onto.

Before we had kids, I made these scones almost every Saturday. We'd sleep in and then I would lazily churn out a batch while the coffee and tea steeped. It was our thing. Before walking the dogs or cleaning the house or heading off on a Saturday adventure, we had to start with scones. After Briton was born the habit fell a little by the wayside. Too many early mornings I suppose, or maybe I just forgot how nice it was to sit around in your pajamas eating hot, buttery scones with your coffee.

This week, Will reminded me about those scones. It's not that I've never made them in the nine and a half years that I've been a mom, but it's been a while. We were having a case of the remembers.

"Remember when Briton thought he could run with his eyes closed if he pretended to be a bat because he had eco-location?"

"Remember how HUGE Evie's eyes were when she was born?"

"Remember bringing home our first chickens in a paper bag?" (The farm store told us to, just to be clear)

"Remember Saturday scones?"

I didn't manage to get them made on Saturday. But on Sunday Evie and I woke up before the boys and pulled out the tattered cookbook where I scrawled the scone recipe, tweaked a little over the years, so that I'd never loose it.
This was the first time I made them in my food processor and I'm sold on it. Normally I cut the butter up in teeny tiny cubed before mixing, which does have the benefit of leaving little butter pockets here and there, but it takes a lot longer. Sunday's scones took all of six minutes to get into the oven. Just make sure you pulse, the way you would with pie crust. The less you mix them, the better the scone.
Saturday Scones
Makes 12 medium scones

7 tablespoons of chilled butter
3 tablespoons of sugar
1 tablespoon baking powder
1 teaspoon baking soda
2 cups of flour
1 egg
1/2 cup milk or whipping cream

plus

1 tablespoon of sugar
3 tablespoons of milk or cream

If you are using a food processor, cut the butter into tablespoons. For a mixer, dice into the smallest cubes you can manage with out going bonkers.

Sift together the dry ingredients into the bowl of the mixer/food processor. Add the butter and pulse or mix until you have the beginnings of that small crumbs stage you get when making pie crust. With the mixer/food processor running, add the egg and then the milk, a quarter at a time, until the dough comes together in a nice ball.

Flour your hands and pull the dough out, dividing it in half. Form each piece of dough into a flat disk that is about 3/4 of an inch thick. Cut each circle into six wedges and pull them slightly apart from one another. This helps the scones to get nice and cooked all the way through but still have a soft, pull apart edge to them (because as they rise they will expand toward each other a little)
If you don't like wedges, you could also roll the dough out and cut out circles or squares or dinosaurs with a cookie cutter, but I find that the re-rolled extras get a little tough after the second re-rolling, so this is the most efficient use of dough I've come up with.

Brush on the extra milk and sprinkle with sugar and then bake at 400 degrees for 12-15 minutes or until the edges are becoming golden.

*Just as a note, these aren't "American" scones which I've never really loved. They are more like a slightly sweet biscuit. Occasionally I've added currents or dried cranberries but I think they are best plain, with just a little sugar dusted on top and heaps of butter and jam inside - or if you happen to have some handy, which I didn't this time, clotted cream and jam.

October 20, 2011

root veg goodness

Cooking and me and the city have, thus far, not been very...copacetic. I've written before about my theory on New Yorkers and eating out and I still pretty much think it's true. Unfortunate, being on a student budget and all, we can't do a whole lot of eating out. Hot dogs from the cart or noodles from the cheap but yummy noodle bowl place are about as fancy as we get take out wise. Add into the mix the fact that this term Will has a night class twice a week and isn't home for supper on those nights till very late and you get me, falling back on easy to make meals. Not even meals. Easy to make things. Mac and cheese. Cheese on toast. Scrambled eggs and cheese (cheese figures highly into most meals since, along with pasta, it is something Evelyn will always eat). It's not how I'd like it, but this year I'm giving myself a bit of a pass. Budget and time is tight. Life is crazy. You gotta make things easy on yourself where you can.

The good news is that it's finally cool enough that our apartment isn't 100 degrees every time we (or really anyone below us) turns on the oven, and this is bringing back a little bit of the cook in me.

Lately, on Will's late nights, I make the kids something very kid friendly and then cook myself something that only I would eat. Out of the four of us, I'm the most adventurous eater. Followed, probably, by Briton, although Will has become much more game to try new things over the years. Still, there are lots of foods (especially of the vegetarian ilk) that my family probably wouldn't eat as a meal. A side, sure, but not as the whole meal.

Right now I'm having a love affair with root vegetables. I've always been a big fan of Parsnips and Sweet potatoes, but again, as a side. And last year I discovered that I really like beets (who knew? I also love brussel sprouts which, after a bad run in with bubble and squeak during my formative years I thought I'd never eat) So a lot of my solo cooking experiments have been centered around whatever root veg I can find at the farmers market.

This weeks favorites (and, sorry, no pics, these meals are usually made and eaten after the kids go to bed, by which time our apartment is so dark and yellow that photographs look very unappetizing) have included Sweet potatoes loaded up like a taco (avocado, sour cream, corn salsa, black beans) and roasted beets with kosher salt, sesame oil and greek yogurt. Delicious. I can't stop eating them. I almost accidentally bought $30 worth of beets on Sunday (15 pounds might have been overkill) and I saw a little mention somewhere about beets with curry spices which might be on the menu next. By the way, the sweet potato taco thing ended up on everyone's plate the day after I tried it and everyone (except Evelyn, go figure) liked it. The beets I'm keeping to myself for the moment. Because, really, I don't want to share.

Do you have any root veg as a main dish recipes that you like? Share, please!

July 7, 2011

chocolate craving + peanut butter playdough =

Yep. Chocolate Peanut Butter Playdough. I kinda wish I hadn't had this particular brainwave, if you can call staring at the jar of chocolate chips trying to think of something cookie-ish that doesn't require turning the stove on a brainwave.
To off set the addition of chocolate I did go with a slightly healthier version of PB playdough that I've been making of late. Less sugar, more oats. Also no dairy. Not because it's not healthy but because I forgot to add some and it turned out yummier and more workable as a playdough.

So here you go. fair warning. I just ate a slightly bigger than a walnut but smaller (just ) than a tennis ball sized lump of it. Muuuummmm...


Chocolate Peanut Butter Playdough

3/4 cup rolled oats
2 T sugar
1/4 cup cacao
3/4 cup peanut butter (the not natural style of PB works and tastes better. Just sayin)
1-2 T of honey

Throw the oats, sugar and cacao into the food processor and whiz it till the oats are pretty finely ground. Add in the peanut butter and mix until you have a sandy texture, drizzle enough honey through the feed tube to form a dough. Roll.Play.Eat.

April 21, 2011

pikelets (ie drop crumpets) : a recipe

For the past two weeks I've been craving, out of the blue, a big pile of warm crumpets. And also french fries. OK, scratch that, I always crave french fries, I mean, who doesn't. But this week I ate some after a long hiatus and now I just want more more more! Ahem, but this is about the crumpets, which are not a normal craving. I know exactly who to blame for this, however.
My friend Jen recently went to England (and Paris, but we wont even talk about that because I might cry if I think about it too hard) and reported back on her blog about how lovely the whole trip was, royal wedding tchotchkes and all. Amongst her tales was the mention of clotted cream. And that, my friends, is what set me off.

The most wonderful, delicious, amazing meal I have ever eaten in my whole life was at the kitchen of one of my English great aunties. I was about 12 and we were there for Christmas and one morning in the midst of the hustle and bustle of having house guests at Christmas, she pulled out a tub of clotted cream for us to eat for breakfast with a package of crumpets. I'm not really sure on the particulars after that, I may or may not have consumed the entire container of the stuff, but it's all a bit of a blur, like in those movies when people fall in love and the camera gets all fuzzy around the edges.

Lest you think that this auntie was some kind of great chef, I should also mention that the absolutely wost meal I've ever consumed in my life was also eaten at that table. Bubble and Squeak. I know there are people out there in the world (somewhere) who love this dish, otherwise, why would it survive? But even in Jamie Oliver or Nigella Lawson popped over and whipped up a batch in my kitchen, I don't think I could taste even the smallest bite. It was a very traumatic experience.

Anyway, all her talk about the English countryside and clotted cream got me salivating over my memories. And this led to a almost insane longing for crumpets. Occasionally I drive over to the Trader Joe's in Richmond and stock up on all sorts of goodies, crumpets among them if they have any, but otherwise, I almost never get to eat them. If you've never had a crumpet, it's like a pancake and an English muffin had a baby and then demanded that it be slathered with melted butter and eaten. I know, right? What could be better?
Over the years I've thought about making them, but you need a crumpet ring thing, which I don't have (although, it might be a good investment, come to think of it). But after several days of having crumpet related dreams, I got online and looked up recipes, just to see if there was a ringless version and low and behold, there was! Even better, the very first recipe I ran across was by Hugh Fearnley-Whittingstall who is my go to guy on jam. And if they guy can get great jam recipes, I know his crumpets will be awesome. Because jam and crumpets go together like, well, like PB and J.
Apparently ring less crumpets are called pikelets. How freaking cute is that? I think I'd make them even if I didn't know what they were just for the name. And other than the need to sit for a few hours to let the yeast do its thing, these were really, really easy. And my kids scarfed them up like they hadn't been fed in a week ( I promise, I do feed them from time to time). They are very yummy, in fact, they are scrummy, as the English say.

I used about half the batter to make little crumpets, using a heaping tablespoon for each, because Evie wanted to have a tea party and if you already have crumpets on hand, well, why not, ya know? The rest of the batter was used up making English muffin sized specimens which we toasted for snacks that afternoon and breakfast the next morning. lots of good, melted butter and a little jam and/or clotted cream if you can find it, make them heavenly. And now I need to go get another batch going because I kid you not, Briton has asked for them at every meal since we ran out three days ago. And I promised that afterschool there would be a batch waiting for him to eat with his afterschool cup of tea (yes, my son often acts like an 80 year old Englishman, he also walks in the door and takes his pants off and drinks his tea in his boxers. Which is just further proof that we are more EastEnders than Windsor Palace type of Brits, and proud of it :))

What are you cooking this week? Anything new? Anything fun and exciting?


Pikelets

adapted from gaurdian.co.uk

3 1/2 cups all purpose flour
1 1/2 cups warm milk
1 1/2 cups warm water
1 heaping teaspoon of yeast
2 teaspoons of salt
1 teaspoon of baking powder
Cooking spray

Whisk the flour, milk, eater and yeast together until combined and then cover with a kitchen towel or Saran Wrap and allow it to sit until bubbly (about 2 hours for me).
Spray a griddle pan with a generous coating of spray and heat to medium low. Stir in the salt and baking powder and drop onto the hot pan by the tablespoon (for small) or 1/4 cup full (for the larger).

Allow the batter to cook until bubbles form all over the top and the batter has stopped looking glossy then flip and cook for 1 minute more. If bubbles aren't forming, add a little more water. Serve hot off the griddle, cold or toasted with lashings of butter or clotted cream.


February 16, 2011

it's the melted butter darling

A few weeks ago Evie and I made a bath of chocolate chip cookies. I had kind of gotten out of the habit of making cookies every week. I mean, for one thing, even if I intend to restrict myself from eating the actual cookies once they are all baked, I still have to taste the dough, right? And also that all important first cookie out of the oven, well, I have to make sure they are fit for consumption. That's my job. And sometimes a second cookie is required, after they've cooled a bit and...well, you get it. I eat them. But it's hard to resist your youngest child when she asks to bake cookies with you. And they were soooo good. Sooooo good. We ate them all in one day. (the four of us that is, geesh, you didn't think just Evie and I ate them all did you? Ok, well, we could have, but we were nice).
So I made some more. And again, they were so freaking good. And not just good, they were pretty. Like bakery cookies. Now I love to bake but I'm no professional, so I knew it wasn't me, it had to be the recipe. I started thinking about what it was that made them so yummy.They do have a lot of chocolate. Really, a lot. And anything with a lot of chocolate has got to be better than just some chocolate. But it's wasn't that. It was the chewyness and the fact that, if they managed to stay around for more than four hours, they were still chewy. But not cakey. Then I realized that, unlike the old chocolate chip cookie recipe, this one didn't use softened butter, it used melted butter. And then I realized that several of the recipes I've tried in the past few months have had melted butter. I wish I could get all science-y on you here and tell you why, but I can't, so I'll just tell you. It's the melted butter darling. (The chocolate doesn't hurt either!)

This recipe started out as Smitten Kitchen's Crispy Chewy Recipe but has a few minor changes. First, I usually use unsalted butter and then salt in baking and I did with the first batch, as is called for in the recipe. But I found that the cookies actually had a slight salty aftertaste. I think it's because we use Kosher salt and maybe the salt crystals were just too big and so you can really taste them when you run into them. The second time I made them I tried adding the salt to the melted butter, and also reduced the salt. And that was better, but not my favorite. The third and fourth times I used part salted and part unsalted butter and left out the salt allotgether, and that was a winner. The other change is that in addition to the chocolate chips I also chopped up a bunch of semi-sweet baking chocolate and added that too. So you get chips and chunks and little speckles of choclate in pretty much every bite. I think the chucnks really make the thing shine. And how could they not, I mean, it's chocolate. I also weighed the ingrediants because that works better for me from batch to batch.
OK, health concious people, look away. No, I mean it, look away. This recipe is not good for you in ANY way. But it's yummy. So I'm going to share it.

So Much Chocolate Chip/Chunk Cookies
Adapted from Smitten Kitchen

5 ounces salted butter
1.25 ounces of unslated butter
190 g dark brown sugar
100 g white sugar
1 egg plus 1 yolk
350 g of flour
1/2 baking soda
5 ounces chocolate chips (milk chocolate)
6 ounces baking chocolate (semi-sweet) broken into chunks

Melt the butter in a saucepan and alow it to cool slightly. Using a hand beater, whip in the sugars and eggs until you have a creamy looking, light brown mixture.

In a large bowl sift the flour and the baking soda together. Fold in the wet ingrediants and mix just until incorporated. Add the chocolate chips and chunks.

The mixture will be a little loose at first but will harden up in a few minutes so it's best to give it a second before starting to scoop it out.

Roll rounded tablespoons-full of dough between your hands lightly and then space about 2 inches apart on a cookie sheet lined with a silicone sheet or parchment. Bake at 325 for 11 minutes and then allow the cookies to cool slightly on the sheet before removing.

And that's it. Pretty basic recipe, just melted butter. Have you had any baking revelations lately?

February 14, 2011

a valentines treat

Valentines day used to kind of stress me out as a kid. It was so difficult to decide which pre-printed card to give to what classmate. Did this one sound too lovey dovey for that boy even-though-I-kinda-liked-him-but-not-really-because-I-didn't-want-anyone-to-know? Or was it just safer to give the gooey ones to the girls? And was that teacher card really special enough for the teacher that I LOOOOOVED? Probably not. I would probably need to make that one by hand. I still get a little twinge of stress, even now, about getting the right card, and probably because of that, Valentines day isn't really my favorite of holidays.
Except for the desserts. The desserts I like.

Growing up I always received a pink heart shaped box of chocolates from my dad for my Valentines treat which I looked forward to each year, pouring over the diagram of what chocolate was what flavor, eating the ones I didn't like first and saving the best for last. When I was in college I met the truffle. When the little box arrived in my student mailbox I felt a little cheated. I mean, one single candy? What the heck. And then I bit into it and all those cheap boxed candies just melted away into a pile of yummy.

These days I'm mostly in charge of the Valentines Day goodies, although Will understands my love for good truffles, especially a certain french variety that they sell at the local gourmet store, but mostly it's me making the treats. I've done chocolate cherry brownies and truffles and the evil salted caramel truffle torte otherwise known around here as the devil cake.
Briton, in true boy fashion, was basically ambivalent about his valentines. I had great plans that involved block printing and silly jokes but when I explained it to him (probably in too much detail, his eyes glazed over) he asked if we couldn't just make a Mad-Lib, and would I type it out for him. So the actual Valentines took all of five minute's to make. What he was really interested in was what treat he would get to bring to class. After some debate we decided on marshmallows. Pink marshmallows.

And then he promptly went off to his friends house to get covered in mud while digging for "crystals". Which really, was ok because there isn't a lot kids can do when it comes to making the marshmallows. Boiling hot sugar and all. But they are fun and despite the rather cool outcome, pretty darn simple. In the end I made two versions. One for the kids that involved rolling the edges in pink sugar crystals (a kind of homemade peep type treat) and the other dipped in chocolate for a grown up party I was headed to. Personally I think the chocolate ones were much better, but Briton thought the sprinkles were a better touch.

Pink Vanilla Marshmallow Hearts
(adapted from Jam it, Pickle it, Cure it)

2/3 cup water, divided
3 envelopes unflavored gelatin
2 cups granulated sugar, divided
1 cup light corn syrup
pinch of kosher salt
1 teaspoon vanilla extract
pink food coloring gel
1 T cornstarch
Cooking spray

Put 1 cup of sugar and the cornstarch into a food processor and set it to whizz for about 3 minutes. You can use powdered sugar for this but lately I've been substituting it for the DIY version. I dislike the overpowering cornstarchy taste and, as long as you have a food processor, this is super easy and works about the same. It doesn't get as powdery but in my mind, that's just fine.

Spray a large jellyroll pan with cooking spray and dust with about 2/3 of the whizzed sugar, making sure the whole surface is well coated.

In the meantime, pour 1/3 cup of water into the bowl of your mixer and sprinkle the gelatin in, allowing it to soften. drop the food coloring in with the gelatin.

In a saucepan heat the remaining water, 1 cup of sugar (not the whizzed kind) the salt and the corn syrup on medium high until it reaches 240. Scrape the sides of the pan down with a heat proof spatula as you go. Be careful because this is HOT! (If you don't have a candy thermometer, and I don't, you can use a meat thermometer, just make sure it doesn't touch the sides or bottom of the pan.)

Turn the mixer on low and CAREFULLY pour in the sugar mixture. add the vanilla and increase the speed to medium and then to high as the marshmallow starts to turn pale. Beat for 8-13 minutes until its sticky and stiff. It will look similar to whipping cream to "stiff peaks" when it's done.
Pour the marshmallows into the prepared pan and sprinkle the top with the remaining whizzed sugar. Pat down with your hands until it's relatively smooth.
Allow the marshmallows to cool and harden, about an hour, before cutting. Now, you can cut any shape you want. You can just cut squares, but hearts are a pretty touch.
To finish either roll the edges in pink sugar or dip the marshmallows halfway in chocolate and the drizzle a little more over the whole thing.

How about you? Are you making anything special this year for Valentines Day?

January 19, 2011

Peanut Butter Playdoh + Food Processor = Love

Peanut Butter Playdoh and I have had a long standing relationship. Long long ago, in a land far away, known as Missouri, Briton and I used to make it several times a week. He would sit up to the counter in his clip on booster chair, which I now cringe to think about (the counter was made of recycled bowling alley - see, we've always been a little odd int eh renovation department - and we installed it ourselves without any real knowledge of how to put in a countertop) rolling and cutting and making shapes while I snuck chunks of dough from the bowl to eat. And then after a while he could catch on the the fact that I was eating up his playdoh and would give up on playing and get down to eating. This was back in the day when I thought he was a picky eater and worried that he wasn't getting enough protein. Of course, now that I'm faced with miss "I only eat beige things" Evelyn, I know what a real picky eater is.
The good news is that peanut butter playdoh is beige-ish and we all still love it. What I don't love though, is mixing it. Sure I do it. But it's sticky, and hard to get really smooth unless you are willing to really get in there with some elbow grease. And frankly, I'm usually sneaking bites and deciding that it will do long before it gets to a really good consistency. Ah-ha, but that was before I got the beloved food processor.
Now, of course, this stuff is just a quick whiz away, which means that we have it around pretty much all the time. Which means I needed to make it a leeetle more healthy. Not that it was ever too terrible. I've always added rolled oats to it to help bulk it out and cut back a little on the sugar, but now we are going sugarless (there is still honey) and no one has noticed the difference. The trick, I think, is that I'm whizzing the dry milk and rolled oats together before adding the playground, chopping them into submission and creating more "dry" to go with the "wet" so the sugar isnt' missed consistency wise. And taste wise, well, I always though the original was a little too sweet. Hence the sneaking of chucks. It's almost candy in it's earlier form.
Just in case you don't have food processor or want to try it in it's sweeter form, here are the traditional proportions

1 cup of dry fat free milk
1 cup of sugar (I never used that much though, more like 1/2)
3/4 cup creamy peanut butter
3/4 cup honey (again, I rarely used this much, it depended on how dry the dough was that day)
optional - 1/2 cup of rolled oats

I generally add the milk, sugar, peanut butter and oats all at once and then add enough honey to make a good knead-able dough. If you get too sticky you can use more powdered milk as you would flour with regular dough.

Now for the healthier and faster version (highly recommended)

1 cup of dry fat free milk
1 cup of rolled oats
3/4 cup of peanut butter
4 T of honey (more or less)

Whizz the milk and oats to a fine powder and then add the peanut butter. Once that is combined, drizzle in the honey while the processor is on until it starts to form into a ball, just like with pie crust.

Just like with the original, use extra dry milk as you would flour if it's too sticky. Store any extra (this makes a good sized batch) in an airtight container in the fridge. Although you probably don't need to refrigerate it, I just tend to eat it if I see it, so into the fridge it goes. Out of sight , out of mind. Or at least I hope.

Do you have any food-play recipes? I think I might be able to branch out a little with Evelyn's food if it's part of her play. Any suggestions?

November 17, 2010

Molasses Cookies

Molasses cookies are a favorite in our house, probably second only to chocolate chip, although Briton would probably say it ties with snickerdoodle. But while I have a good, solid chocolate chip recipe and several yummy snickerdoodle ones, I've never found a really good recipe for molasses cookies and so I usually just end up buying them when I want one with my evening tea.
Last night I got a wild hair to make some cookies, well past cookie making time, into get everyone into bed time in fact. The jar o' chocolate chips was running a little low and I wasn't in the mood for sugar cookies or snickerdoodles so I did a what-the-heck websearch and landed on a recipe that looked promising. And boys howdy was it. Yum. I mean YUM. They came out of the oven long after the kids were asleep (that one hour wait is crucial I think, so don't skip it!) and Will had crashed our on the couch so it was just me and my knitting and my cookie with a mug of eggnog (I know, I'm early on that one but it was just sitting there staring at me at the grocery store! I couldn't help it!) At some point Will must have woken up though and helped himself because there were several missing when I got up this morning.
If you like molasses cookies, make these. Tonight. They have that perfect chewy but crunchy from the sugar coating texture. It's been very hard not to eat a few this morning. The original recipe called for margarine but I'm just a butter girl so I substituted and I can't imagine that they could have been better with the margarine, so I'm sticking with it.

Molasses Cookies
adapted from All Recipes


3/4 cup of melted butter
11/2 cup white sugar - 1/2 cup reserved
1 egg
1/4 cup molasses
2 cups of all purpose flower
2 teaspoons baking soda
1/2 teaspoon salt
2 teaspoons pumpkin pie spice

Beat butter, 1 cup of sugar and the egg until smooth, add molasses until well mixed. Fold in the flour, soda, salt and spices and chill for 1 hour.

Preheat your oven to 350 and pour the remaining 1/2 cup sugar into a bowl. Roll chilled dough into walnut sized balls and then roll in sugar. Place 2-3 inches apart on a lined cookie sheet and bake 9 minutes (you want them puffed up, starting to crack and just barely browning around the edges. Remove the pan from the oven and allow the cookies to cool for 15 minutes on the pan.

Makes 2 dozen

November 4, 2010

Autumn in a Bowl

This week I've been fighting one of those wont-go-away kind of colds that has left me wanting to do nothing that involves getting off the couch. And since Will is also wrestling the same cold, dinners have been pretty simple affairs around here. Lots of pasta and pizza and tortilla wraps. The kids have been overjoyed and the lack of dishes has been much appreciated by the adults.
Yesterday afternoon, taking advantage of what I can only guess was a Dayquil induced energy spurt, Evie and I dug up the last of the carrots and the first of the parsnips and sweet potatoes. Washed, peeled and chopped, the tail end of our garden produce made a very yummy and very warming roasted vegetable dish for last nights dinner (and today's lunch). This recipe was inspired by this and this (which was recommended to me by a reader and is still on my list to try) and then also using up what was on hand. I should forewarn you that I like strong curry flavors, particularly when I'm sick and can't smell much of anything, so if you aren't a huge curry fan, you might want to tone down the spices a little. But if you want something cozy and easy one of these nights and chicken soup is not in the cards, here you go.
Curried Root Veg and Beans


1 cup of peeled carrots, cut into 3/4 inch pieces
1 cup of peeled parsnips, cut into 3/4 inch pieces
2 cups of peeled sweet potato, cut into 1 inch pieces
1 tsp curry
1 tsp pumpkin pie spice
1/2 tsp cumin
1/2 tsp salt
2 T olive oil
1 T sherry
1 can of Great Northern Beans, rinsed
Dressing - 1 T tahini
1 tsp sherry
1 T olive oil


Toss everything except the beans in a bowl till well coated (hint - it's easier to toss the veg with the spices first and then add the oil and sherry) and spread out on a cookie sheet. Roast at 400 degrees, turning every once in a while, for 45 minutes or until everything is soft and starting to carmelize. Slide into a heat proof bowl and gently toss in the beans and dressing. Top with chopped pecans and sour cream.

*The kids and Will ate this over pasta but I ate it straight. Good both ways it seems....

October 19, 2010

Soup's On


So it's cold out. Not freezing cold, just yay! time to wear a hat and scarf in the morning cold. Remember those slippers that took me forever to knit? Well I'm loving them now. Worth. Every. Stitch. And cold weather means soup in our house. Lots of soup. I would eat soup every day but the wild things probably wouldn't go for that, so for now, I'm trying to limit it to once a week. Ok, maybe twice a week.

I love all soups but recently I've really been into beans. I think I had a bean-phobia before because I really haven't cooked with them much beyond warming up black beans for burritos. But between my "eat less meat" thing and my "make healthier food" thing and my "crap, let's lower the grocery budget again" thing, well, beans are making a stand in our house. And boys howdy, I didn't know what I was missing. Beans are good! No, really! Beans are GREAT! WHo knew (ok, everyone else knew)

I've been filling up our weekly menu with bean meals. White bean and chicken enchiladas, homemade falafel, beans and rice and our favorite - white bean and sausage soup. Or if you want to get fancy, cassoulet.

Now I am neither french nor any kind of trained chef so when I say this is cassoulet, I'm using the term loosely. I read a bunch of recipes, mixed them all up and then cranked out this soup with what we basically had in the pantry and freezer. But it was a winner for us. Will even went back for seconds. Usually he patiently eats his bowl and then fixes himself a sandwich, soup just isn't enough food for him I guess.

But this is more stew-y than soupy. It's yummy and filling and easy, although it does need a little time to simmer away. I've been making it at lunch for the evenings dinner but I've also noticed that it's even better the next day so I think it would make a great night before kind of meal.

1/2 yellow onion, diced
2 T soup mix *
3/4 cup sliced carrots
3/4 carton chicken stock
2 cans of navy beans
4 chicken apple sausages, sliced 1/2 in thick
salt to taste

Sweat the onions in a teeny bit of oil until they are golden and slightly translucent, add the soup mix and sweat a few minutes more. Dump in the rest of the ingredients, give it a stir, pop the lid on and let it simmer on low for three hours. Add a little more stock before serving if you want a thinner soup. Serve with sour cream and minced parsley.

*Soup Mix - this is a homemade bouillon of sorts that I made in August which I LOVE and will make a ton more of next summer. Actually, I probably make more later in the winter because it's fantastic. The basic recipe came form my favorite canning book but I adjusted the ingredients to utilize what was coming out of the garden at the time.

2 cups carrots, finely chopped
2 cups parsnips, finely chopped
4 garlic cloves
1 cup of parsley

Whiz this in a food processor (or crappy mini chopper if that's what you've got, don't feel bad, me too) until you have teeny tiny pieces. Weigh the veggies and add 1/4 the weight in kosher salt. Stir well and spoon into jars. The salt preserves the veggies. You only need a tablespoon or two to start off pretty much any soup, stew, casserole, really anything you might add bouillon too.

What's you're favorite cold weather meal? Any good bean recipes?

October 14, 2010

Garden Clean Out Chutney

I've had it on my list to make chutney all summer long but somehow it always got pushed aside by jellies, jams and sauces, not to mention everyday cooking. But finally, finally, I got around to it yesterday and now I have two lovely jars sitting in our pantry waiting to be eaten up throughout the winter.

I haven't always been a chutney person. When I was doing my student teaching, my mentor teacher gave me a jar of kumquat chutney for Christmas. It looked beautiful, but I had no clue what to do with it, particularly on our ramen noodles for dinner budget. It sat in our fridge for ages, eventually getting stirred into some kind of stew I believe, before it went bad. What a waste. But hey, I was young and clueless.

When Briton was about two I fell in love with Indian food. Hard. I'd had curries before, but mostly of the homemade and basic variety. It wasn't until we were living in Dublin, where curry take-out is the norm and fantastic Indian food can be found cheap in almost every neighborhood center that I really discovered it, and chutney.

And then our supper club had a burger extravaganza and one of the offerings was a lamb burger with goats cheese, good mustard and sweet-savory chutney (try it! you'll never look at a burger the same again!) and I finally got what all the chutney lovin was all about.

It's a good thing I finally got around to making some then, eh? I'm calling this Garden Clean Out Chutney because most of what's in it was what was left when I ripped out everything from three of our four beds. But I could also call it Pantry Clean Out Chutney, because it also has some strange-o things that I pulled out of the back of our shelves (chili spiced mango from Trader Joe's anyone?) After reading a bunch of recipes though I think you can use pretty much any combination of fruits, veggies and spices that you have hanging around, but here is what I made:


Garden Clean Out Chutney

4 cups diced green tomatoes
1 cup diced green apples
1/2 cup raisins
1 small jalapeno, finely chopped
1/2 cup chopped dried chili spiced mango ( you could just dried fruit, but then you want to add chili powder to taste)
2 cups apple cider vinegar
1 cup packed brown sugar
1 tsp ground ginger
1 T salt

Mix all ingredients in a heavy bottomed pan. Simmer on medium until everything has muddled down and reduced by about a third. Pour into sterilized jars (this makes about 2 pint jars, I used 1 pint jar and one of my tab top jars because I needed an excuse to get down my Wide Mouth Jar Rubber Box and have a laugh) and process as you would with jam.

August 23, 2010

Can-o-Rama

This weekend, in between painting the front of the house (picture soon! Still finishing the second coat!) Organizing Briton's Birthday, playing board games, finishing up another back to school sewing project and hitting the pool, I canned. A lot. I didn't really intend to have a canning bonanza, it just that, well, while one thing was cooking away, I'd start flipping through my books and think, "oh I have everything to make that too!" and away I went.

Most of the things I made were based on recipes from the River Cottage Handbook no. 2:Preserves, which is one of the best canning books I've ever seen. For most recipes it offers ideas for variations or explains how to substitute pretty much whatever is ripe in your garden or the farmers market at the moment. So instead of making the Hedgerow Jelly with crab apples and mixed wild berries, I used apples and blackberries from the Fruit Share I ordered from a local CSA to make probably the yummiest jelly ever. I know Will will argue and say strawberry is still the best, but I really think this might be my new favorite. I also made Passata, a roasted tomato, onion and garlic puree that you use to add to soups and stews and a vegetable bouillon mix from the squash, carrots, parsnips and shallots we had in the garden (including one giant carrot that Briton pulled up) and parsley from the farmers Market. The figs I had started for drying weren't, unlike those from the neighbors tree, holding together, so I finished off the mashing and turned them into fig jam.

I've still got some chutney in the works and want to make another batch of Passata, and if I can get enough seed pods from my Nasturtiums, I'd love to try to make Nasturtium Capers. But the thing that was the biggest hit this weekend was a batch of Plum/Apple/Pear Squash which Briton is calling Grimmbena. Ribena has been a staple in our house since Briton was two. It's a juice concentrate, or squash, made from Black Currents and is the go to drink for kids in the UK. Sort of like their TreeTop Apple Juice. It's handy for us because you just keep it in the cupboard and pour a little into a glass of water when you want some juice. Which means it doesn't take up any room in the fridge. Great for us since we have limited refrigerator space. So when I noticed the recipe for whatever fruit squash, I couldn't resist. The kids picked out super ripe plums and apples at the farmer's market and I had some pears form the fruit share so we chopped them all up, added some water and let it cook away till the fruit was mushy. Once it was strained and the sugar was added and we had it bottled up we tried it out and wowzers was it yummy. Addicting yummy. I need to go back to the farmers market for some more plums and apples and make more yummy.

Grimmbena (Or Plum-Pear-Apple Squash)
Translated roughly to US measurements from The River Cottage Handbook No. 2

2 pounds of plums
1 pound of apples
1 pound of pears
4 cups of sugar
water

Chop up the apples and bears roughly, leaving pips and skin. Cut the plums in half, you can pull out the stones but you don't have to. I didn't!
Add 2 and a halfish cups of water and bring slowly to a boil, cooking until the fruit is very soft, about 45 minutes. Strain through a jelly bag and colander, or if you don't have a jelly bag, use a tea towel that you have scalded in hot water. Let it drip for several hours until the juice is drained away from the pulp. Bring the juice back up to a boil and then add the sugar, stirring just until it has dissolved. Pour immediately into bottles and seal. Use 2-3 tablespoons of concentrate per 8 oz of water.

The recipe claims that just by bottling it up hot it will keep for several months in a cool, dry place but that you can process it in boiling water if you want to keep it longer. I reused a glass bottle and put the rest in a jar, sealing them both up while it was hot and leaving it at that. I'm sure we'll use it up fairly quickly. However, for the next batch I'll pick up some good bottles and do the whole processing thing. You can really use any fruit for this that's ripe. Harder fruits need 1 3/4 cup of water per 2 pounds of fruit, softer fruits need 1 cup of water per 2 pounds of fruit. The sugar can really be adjusted to taste, just remember that this is a concentrate, so you'll want it stronger than if you were drinking it straight.

August 10, 2010

Holy Grits


The summer after fifth grade, my parents moved my brother and I from the small, picturesque Northern Idaho town where I'd grown up and my brother had been born, to San Antonio, Texas. It was, you might say, something of a shock. We moved there at the beginning of August, and I still remember stepping off the plane and into the sweltering humidity of a Texas summer. I thought I was going to die. I thought my parents were crazy. But no, they were just ready for a change.

My father was starting his Master's Degree at the University of Texas and so for the next two and a half years he was home with us, studying, instead of spending his days in a crowded and noisy newsroom. I loved having him home more. We had two fantastic summers that involved lots of trips to the Alamo (my brother was obsessed, REALLY obsessed, with Davy Crockett) boat rides along the river walk, day trips to the missions, hot afternoons at the Texas Folk Life Festival, and jalapeno grits.

My dad had started a garden the first spring that we lived there. Nothing new about that, we'd had a large garden in Idaho brimming over with potatoes, beans, tomatoes, onions and peas. But in San Antonio, the things we normally planted didn't grow as well. I'm probably remembering this wrong, seeing it in my mind as I did at eleven, but I think the only things that really grew in that garden were peppers and okra. And I hated both. Okra I disliked on principle. They were slimy and ugly and even the name sounded bad to me. I turned my nose up at them without even tasting them, and admittedly to this day, I'm not sure I've ever tried okra, which is probably something I should remedy. Peppers, however, I lived in mortal fear of.

On one of our first nights in San Antonio, we'd gone to eat at the Alamo Cafe. I was fascinated at the tortilla makers behind the glass partition and couldn't wait to try them out, crisp and hot, straight out of the pan. When a basket of chips arrived at our table I picked one up and dug it into the bowl of chopped tomatoes, loading up my chip and shoving it in my mouth only to find that my head felt like it was on fire. I'd never tasted Salsa in my life and I sat there, tears running down my cheeks from the pan on my tongue, wondering what I had done to deserve this horrible fate.

So when my dad's garden produced a bumper crop of pepper and he tried to introduce us to Jalapeno Grits, there was no way I was going to try them. I didn't do peppers thank-you-very-much! I didn't do spicy at all. And somehow, grits, in my mind, became just another part of the "No Thank You!" that the peppers had caused.

And I've spent the last twenty odd years no eating grits because of it. Until a few weeks ago when my friend Stephanie invited us over for Pulled Pork and Grits. Now I still had my fear-o-grits, but a few things convinced me to give it a try. First, Stephanie is a great cook, so how bad could they be? I've never eaten anything at her house that wasn't stellar. Second, poor Will loves grits. He's a Texan for goodness sakes. They give them Dr. Pepper, steak and grits as soon as they pop out! And in all the years we've been together, it's probably the one thing I've always refused to make for him. Also, the older I've gotten, the more open I am to trying things at least one. So I tried. And guess what. Yep. I LOVED them.

This wasn't just "humm, that's pretty good" love either. This was have two giant bowls full, holy cow what have I been thinking my whole life, dream about it at night love. I LOVE grits. I also, incidentally, tried Sriracha hot sauce that night. Yeah I know, everyone and their dog is talking about sriracha, but I hadn't ever tried it because, well, I'm still a wimp when it comes to spicy things (see salsa story above) Ya know what, pretty darn delicious too.

So now I'm a grits freak. It's my new go-to meal. Will thinks he's died and gone to Texas heaven. It's like the day halfway through my pregnancy with Briton when I went from vegetarian to "I WANT RIBS!" I thought he was going to cry with joy.

Stephanie used the WIlliams Sonoma Cheese Grits recipe which, as I said, is really good, but has a lot of butter and extra cheese and is slightly more time consuming than I'm willing to go for when I want grits. So instead I've been using this very simple recipe, which is fantastic with a few shrimp tossed on top. Excuse me while I go stuff my face.

1/2 cup stone ground yellow grits
1/2 cup milk
1/4 cup water
salt and pepper to taste
1/2 cups cubed cheddar cheese

Bring 2 cups of water to a boil and slowly stir in the grits. Cook on medium low for 10 minutes. Stir in half the milk and stir until absorbed. Add cheese and remaining milk stirring as you go, and dribble in water as needed. Season to taste.

August 6, 2010

Freakishly Healthy Banana Muffins


I've made a lot of banana bread in my time. In fact, I think it's a requirement of motherhood that you make banana bread at the very least a dozen times a year. This is, or course, because children love banana's. I've never met a kid who didn't. Banana was, sort of, my first word. I say sort of because I called them "das" so I'm not sure if it really counts as a first word, but my parents knew what I meant. But the reason that banana bread is a fact of parenting isn't because kids love bananas, since if they really loved them, their wouldn't be bananas left to make bread from, but because children love to mess with your mind. The LOVE banana's one week, so much so that the next week you buy three pounds of them so that your child can have all the banana's they want. And that's when they decide they don't care for bananas after all. It's just a law of life, right about the time you think you have something figured out, it changes. Thus banana bread.

The other things about banana bread is that it's almost healthy, sort of. At least healthy enough that you don't feel totally guilty giving them a few slices for their snack (or meal, who are we kidding), much better than, say, that bright blue gogurt they wanted at the store (why would yogurt makers think it was a good idea to make neon blue yogurt? It just screams BAD FOR YOU! But I digress).

So I've made a lot of banana bread. And because I really like to tinker and toy and try out new recipes, I've tried several different versions. I had high hopes for Molly Wizenberg's recipe. It was good, but not as great as I'd hoped. The kids weren't too nuts about it. But this version, they seriously love. I mean, gone in a second, they don't want anything else for lunch but banana bread when I make it crazy for it.

And the best part is -not that I would ever tell them because then they'd probably turn their noses up at it - it's by far the healthiest version I've ever EVER made. Or even come across I think. Maybe they aren't really freakishly healthy but they are pretty darn good for you. I've made this as a loaf but I think it's even better as muffins, so that's how it works in our kitchen. Super (shhh..healthy) good banana muffins.

4 very ripe bananas
1/2 cup sugar
1/4 cup Splenda (or sugar if you don't like Splenda)
1 can pear halves (I use the packed in juice variety)
2 eggs
1 cup whole wheat flour
1 cup all-purpose white flour
2 teaspoons baking soda
1/2 teaspoon salt
1 T cinnamon

Mash the bananas and pears in a medium bowl with a potato masher before stirring in sugar, Splenda and eggs. Sift in dry ingredients and fold gently until combined. The batter should be slightly lumpy with chucks of pear and banana.

Scoop 1/3 cupfuls into lightly greased muffin tins and bake at 350 for 20 minutes. Remove from pan immediately and allow to cool slightly for a few minutes before serving.

As soon as these are cool I put them (what's left of them that is) in a Pyrex dish with a lid to keep them moist. But I don't think we've made it through the end of the day without eating the whole batch, so I've no idea if they keep longer than that :).

August 5, 2010

Fig Season

So as it turns out, I'm feeling bold. Or at least this morning I was feeling bold. On my way up to feed the chickens I spent ten minutes picking a basket full of ripe figs. I could have spent an hour and had bushels, but that would have required a ladder, and the chickens were starting to squawk with impatience.

After removing a handful for my breakfast I weighed (3 1/2 pounds) and washed the figs and set them out to dry off a little while I decide what to do with them. I can either go with the Drunken Fig Jam recipe from Epicurious or I can get my grandmothers dried fig recipe going in the hopes that by the time the four days it takes to prep them for drying, Will and I can have some kind of solar dryer rigged up. I'm thinking the latter, because Will likes dried figs as much (well, not really as much, but he does like them) as I do (drat the man, I used to have them all to my self!:)) And while I like fig jam, well, it's certainly not as high on my list as dried figs. I mean, duh, I named my blog after them. Right?

My grandmother's dried fig recipe is something of a mystery to me. I could, of course, ask her about it. But it's kind of fun to just wonder. Here's how it reads

5 lbs fresh figs with stems (I may have to get that ladder out to make up that 1 1/2 pound difference!)

wash and add 2 cups of water and 1 cup of sugar

1. Boil one hour covered. Pour into a glass dish
2. Next day - boil 1 hour uncovered
3. Next day - boil 1 hour uncovered
4. Next day - boil 1 hour uncovered

Drain in colander, let set until cool. Take out and shape. Lay on racks to dry in the sun. Dry until no longer sticky feeling. Turn over at least once while drying.

OK, so here's my theory. My grandmother had five kids. FIVE. And she was one of those wonder women who made most of their food from scratch, preserved a ton of things from the garden, sewed clothes and quilts and whatever else needed making. So I'm not saying this is how it happened, but if that were my recipe, it would have come about from a) starting to boil my figs too late in the day and then realizing that I needed the pot for dinner, hence the glass bowl. And then I would have forgotten about then so the next day I would have to reboil them. And then I'd forget again and have to reboil them again. And then I'd have to run out and get some part that my kids took off my dryer for a project that I didn't remember until just that moment so I'd have to reboil one more time. But my grandmother was probably far more organized than that, so I'll just take it on faith that this is just the way the recipe has to be. And after all, I've never in my life had a dried fig that was as good as hers always are, so I'm willing to follow it to a "T". Although I may have to use a ceramic bowl instead of a glass, unless I feel very virtuous and go out and buy a glass one. But I've already been bold today, so virtuous will probably have to wait until tomorrow.

June 28, 2010

Accidental Goodness


So I'm sure I'm not the only one that this happens to, but sometimes my baking projects just plain go wrong. Things don't rise or I leave them in too long or whatever. Hey, it happens, right? And unlike cooking, where you can more often than not just deal with things as they are, add a little more of this or that and go ahead and dig in, I find that baking gone bad more often than not just needs to be binned. I mean, who wants to eat a dry cookie right? Or worse, a dry cake? But occasionally the going wrong leads to something better than what you intended. And honestly, it's for those times that I love baking.

This weekend the kids and I decided to make a batch of graham crackers, something I've been meaning to try for a while, they seem to pop up on a lot of the blogs and cookbooks I like. I read through a few recipes and settled on a variation of Alton Brown's. The variation being that I didn't have graham flour. But I'd seen a lot of versions that called for whole wheat flour instead and that I had.

The other variation was that it called for a food processor and I don't have a food processor. I know, I hear you, what in the world am I doing without a food processor? Well, tell it to my husband. I've been saying it for years. The problem is that I do actually have one, it's teeny, and I mean teeny. It holds just one cup of whatever needs to be chopped. Which is perfect for nuts or onions or a small batch of babyfood in the days that I made babyfood, but for baking, it's crap. Still, it works, after 13 years, it works. It's held up better than my Stand Mixer, and I think it cost me all of $7. So until the thing dies, I have to live without. Which is normally no big deal (although, Will, if you are reading this, I would really like a food processor because, come on! I cook!) But I think it may have been the downfall of this recipe. Or maybe I should say the saving grace.

Because I couldn't really get the butter and flours worked together in that magic pea sized crumble, the dough didn't come together quite enough to roll it out thinly. So half of it we rolled out as best we could, to about 1/4 inch, and the rest we made into squeeze cookies, something I read about last year on Chocolate and Zucchini. The "crackers" puffed up quite a bit and ended up with a soft, chewy, almost gingerbread like consistency (real gingerbread, not cookies) and the squeeze cookies had a little crunch on the outside while still being soft on the inside.

We blew through them.

Today we made another batch and this time we grated the butter, which helped, but it was still pretty crumbly. I even added an extra 1/2 ounce of honey (I cut the molasses down to 2 ounces and added honey to make up the difference, which also could have had something to do with the dryness of the dough I guess) but since the kids declared they wanted them to be "squeezy" again, well, I wasn't too concerned.

We're almost out again. I kid you not. Better than Oreos though.

So here they are, "Not Graham Crackers"


"Not Graham Crackers"
adapted from Alton Brown


  • 8 ounces whole wheat flour
  • 2 ounces all-purpose flour
  • 3 ounces dark brown sugar
  • 3/4 teaspoon baking powder
  • 1/2 teaspoon baking soda
  • 1/2 teaspoon kosher salt
  • 1/2 teaspoon ground cinnamon
  • 3 ounces unsalted butter, chilled and grated
  • 2 ounces molasses
  • 1 ounce honey
  • 1 1/2 ounces milk
  • 1/2 teaspoon vanilla extract
Sift the dry ingredients in a medium bowl and blend in the butter with a fork or your fingertips until it is as incorporated as you can get (or if you are lucky and have a food processor, use that!) Make a well in the center and add the rest of the ingredients, folding them in until combined. Wrap the dough in plastic wrap and chill for 30 minutes.

Preheat your oven to 350.

Roll out the dough to a thickness of 1/4 inch on parchment, transfer to a baking sheet and score into rectangles without separating them. OR, pull 2 tablespoons of dough out into your hand and squeeze it into a ridged oblong shape. Space them two inches apart on parchment. Bake either (or both) for 15 minutes.